You slide a ceramic mug across the dining table, and there it is—a jagged, pale line breaking the warm grain of your favorite walnut credenza. The instinct is to panic, to rush to the hardware store for putty, masking tape, and harsh solvents. You stand there tracing the damage with your thumb, already dreading the weekend project ahead.
The standard fix is a noisy, dusty affair. You imagine the smell of toxic chemicals in your living room, the grit of 220-grit paper under your fingertips, and the near-impossible task of matching a synthetic paste to natural timber. It feels like performing surgery with a sledgehammer, violently altering the surrounding finish just to mask a minor abrasion.
But there is a quieter, older method sitting right in your pantry. By holding a simple shelled English walnut, you replace a thirty-minute chore of sanding and blending with a friction-based reaction that respects the living nature of the material. It requires no curing time, no ventilation, and absolutely no sanding.
The Perspective Shift: Why Spackle Fails Where Fat Succeeds
We are conditioned to treat damaged furniture like a hole in drywall. When you apply chemical wood fillers, you are essentially plugging a gap with dead plastic. These fillers sit aggressively on top of the scratch, demanding extensive smoothing and precise color matching that rarely survives a change in the morning lighting.
Wood is not drywall. It is a porous, breathing membrane, much closer to dry skin than plaster. When you rub the meat of an English walnut into a superficial scratch, the friction warms the nut, releasing its heavy, natural oils. You are hydrating the wound, not burying it under a layer of synthetic spackle.
These oils do not just sit on the surface; they penetrate the exposed fibers. The wood drinks the fat, causing the cellular structure to swell slightly. This naturally closes the physical gap while the brown oil seamlessly dyes the pale scar to match the surrounding grain, making the visual interruption disappear instantly.
Thomas Miller, a sixty-two-year-old antiques restorer working out of a dusty, sunlit barn in upstate New York, relies on this exact pantry staple. “People drag in beautiful sideboards ruined by epoxy and cheap marker pens,” he mutters, firmly rubbing a raw kernel against a scarred mid-century table. “Half the time, the wood is just thirsty and bruised from a minor impact. Feed it the oil it grew up with, and it usually heals itself right before your eyes.”
Adjusting the Treatment: Recognizing Your Canvas
Not all timber behaves identically under pressure. To achieve the cleanest repair, you need to read the surface finish before you start applying friction.
For the Antique Purist: Older pieces finished with shellac or simple oil are the perfect candidates. Because they lack a hard plastic shell, the exposed scratch absorbs immediately. The walnut oil merges with the existing patina, aging gracefully alongside the original finish without leaving a cloudy residue.
For the High-Gloss Keeper: Modern, mass-produced furniture often wears a thick coat of polyurethane. A scratch here is usually just a tear in the clear plastic layer, not the wood itself. While the nut oil will darken the white, chalky appearance of the scratched plastic to make it invisible at a glance, it won’t swell the wood beneath. You are applying a temporary optical illusion rather than a deep structural fix.
- Dawn Powerwash spray instantly lifts set carpet stains without heavy scrubbing.
- Baking soda paste permanently etches delicate non-stick frying pans during scrubbing.
- Talc-free baby powder sweeps into floorboard cracks silencing squeaky wooden steps.
- Clorox bleach spray permanently yellows white fiberglass bathtubs after three uses.
- Uncooked white rice safely cleans inaccessible narrow glass vases completely overnight.
Mindful Application: The Friction Technique
Erasing the scar requires patience, not brute force. You are coaxing the oil out of the nut, relying on your body heat (around 98 degrees Fahrenheit) and gentle, deliberate movement to lower the oil’s viscosity.
Gather your materials before you begin. You need nothing more than a few fresh walnuts, a soft cotton cloth, and a quiet moment. Discard any dry, shriveled nuts, as they lack the necessary fat content to properly hydrate the fibers and will simply scratch the surface further.
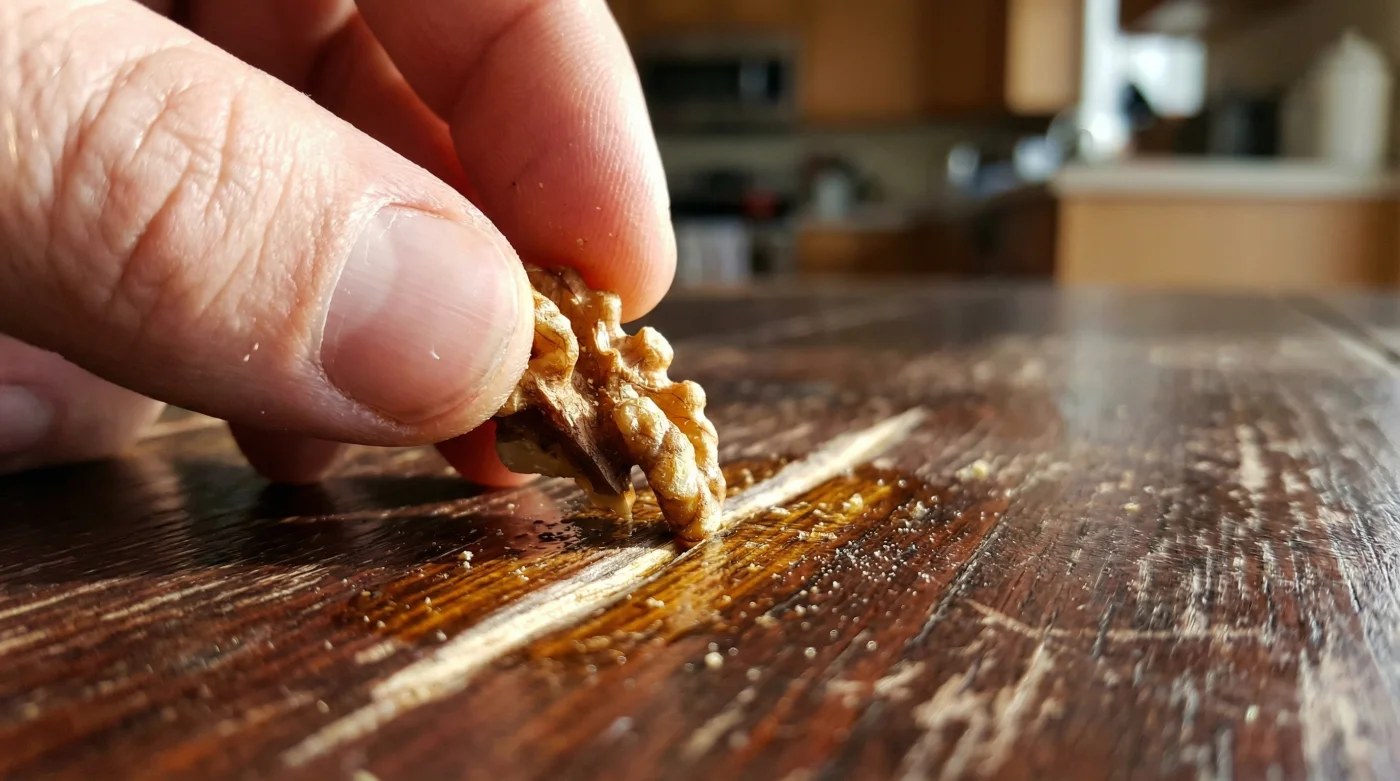
- Break the walnut in half to expose the jagged, meaty center.
- Press the exposed meat directly against the scratch, rubbing diagonally across the grain to force the oil into the groove.
- Maintain firm pressure until the nut begins to crumble slightly and the wood feels warm to the touch.
- Leave the oil to sit and penetrate for at least five minutes.
- Buff the area gently with your cotton cloth to remove excess debris and blend the sheen.
If the scratch remains slightly visible, repeat the process. Sometimes, the timber is severely parched and requires a second heavy serving of oil to fully swell the damaged fibers back into alignment.
The Bigger Picture: Rethinking Perfection
When you abandon the harsh chemical fillers and embrace the humble walnut, you fundamentally change your relationship with the objects in your home. You stop viewing everyday wear and tear as a stressful crisis requiring a trip to the hardware store and an afternoon of labor.
Every nick from a dropped set of keys or a heavy plate becomes a manageable moment. You become a quiet caretaker, maintaining the warmth and history of your furniture with the exact same organic materials that sustained it in the forest.
A home is meant to be lived in, and solid wood is meant to age. By letting go of the illusion of absolute perfection, you allow your space to breathe. You preserve the character of the piece while simply softening the loudest accidents into quiet, comfortable memories.
Thomas always said, “You can’t force a piece of wood to forget a scratch, but you can certainly help it forgive.”
| Key Point | Detail | Added Value for the Reader |
|---|---|---|
| Chemical Filler | Apply, dry, sand, paint. | Requires significant time and professional color-matching skills. |
| English Walnut | Rub directly into the scratch, wait, buff. | Saves you 30 minutes of labor and seamlessly blends the scar naturally. |
| Wax Stick | Melt or rub wax into the void, scrape flush. | Provides physical fill but misses the deep, restorative hydration of natural oil. |
The Caretaker’s FAQ
Does this work on black or very dark wood?
Yes, the oil naturally darkens the stark white chalkiness of a fresh scratch, making it visually disappear into darker finishes without needing black pigment.Will the walnut oil go rancid inside my furniture?
No. In such microscopic quantities trapped inside the wood fibers, the oil naturally cures and hardens long before it ever has the chance to spoil.Can I use roasted, candied, or salted walnuts instead?
Absolutely not. The salt crystals will violently scratch the finish further, and the high-heat roasting process completely depletes the natural oils you need for the repair.How deep of a gouge can this technique actually fix?
It works phenomenally well on superficial, surface-level scars. Deep gouges requiring major structural fill will still eventually need a proper putty or hard wax.Do I need to seal the scratch immediately afterward?
Not immediately. The cured oil acts as its own protective barrier, though you can confidently polish or wax the table normally during your next weekend cleaning routine.